Initial Problem
In the previous post, I created a clear boundary between my family's home network and my lab's network by installing a firewall. That separation allowed me freedom to experiment without disrupting others.
However, separation introduces another problem: how do you access a network remotely without weakening the boundary that was just built?
Access needed to be granted for these purposes:
- Hosting a Minecraft server
- Viewing security cameras
- Performing administrative tasks
- Secure private browsing while away from home
The moment remote access is introduced, the landscape changes completely. Traffic is no longer starting from inside the house, it comes from wherever the user may be. That means exposure shoots up, and the solution must assume untrusted networks.
Simply opening ports directly to services wasn't an option. That would defeat the purpose of the firewall as a controlled boundary and increase attack surface unnecessarily.
At the same time, the solution couldn't be too complex. If family or friends needed access, it had to be both secure and practical.
What is WireGuard
WireGuard is a modern Virtual Private Network (VPN) protocol that facilitates a secure, encrypted tunnel between remote devices across the internet.
Unlike older VPN protocols such as IPsec or OpenVPN, WireGuard was created with a clear goal of simplicity. Its codebase is far smaller, making it easier to audit, maintain, and deploy. The configuration is also minimal by design, using private and public key pairs (asymmetric encryption) instead of more complex certificates.
Each device involved in a WireGuard network is a "peer" and is identified by its public key. When two peers trust each other's keys, an encrypted tunnel can be established between them. Traffic sent through this tunnel is encrypted and routed based on the configured allowed IP ranges.
Why It's Critical in My Lab
I would describe WireGuard as critical in my lab for several reasons.
Firewall Boundary
My firewall acts as the boundary to my lab network, allowing only certain connections to pass through. This firewall runs OPNsense and hosts WireGuard as a service. Each WireGuard instance operates on its own interface, completely separate from my Local Area Network (LAN). As a result, the only traffic allowed from WireGuard into the LAN is what is explicitly permitted through firewall rules.
Controlled Ingress
WireGuard also offers visibility into the remote connections established. I can see when users connect, how long they remain connected, and how much traffic they are generating. This basic monitoring gives me a simple way to make sure that remote access is behaving in expected ways and allows me to identify suspicious behavior.
Minecraft Server
Minecraft servers are frequently exposed to the public internet through port forwarding or domain hosting. Although this works, it allows anyone on the internet to discover and attempt to connect to the server. With WireGuard, the server is not exposed in the same way. A secure tunnel must be established first, before access is possible. Only after that connection exists can users reach the Minecraft server.
Camera Access
Unlike a game server, a camera system can bring serious privacy considerations. These cameras support visibility into my home and are for the members of my family. Instead of exposing the camera system to the internet or granting Wi-Fi access broadly, access is available almost completely through WireGuard connections.
Administrative Access
I also need to manage my network while away from home. This includes viewing services, adjusting firewall rules, and performing maintenance. Since admin work requires the highest level of trust, I run another instance that is dedicated specifically to my own management access.
Avoiding Public Service Exposure
One of the most important benefits of this structure is that services are not directly exposed to the internet. Instead of placing cameras, Minecraft servers, or admin interfaces behind only a username and password, a pre-established key pair must first be used to permit WireGuard to create a tunnel. This significantly reduces the attack surface of the network by only allowing pre-approved users through tunnels instead of anyone from the internet.
User Simplicity
Finally, the system needed to be simple enough for any technical level. Connecting to the network requires an easy import of a config file. Once added, users can switch on or off the connection as needed, while maintaining access to the services they are authorized to use.
How It's Set Up
WireGuard in my home lab is actually a relatively simple setup once the initial setup has been completed. However, a few pieces must be configured correctly before any remote connection can be made.
First, OPNsense must be installed and operating as the firewall for my lab network. Inside OPNsense, I created multiple WireGuard instances that serve different purposes. In my case they are separated by function: admin access, cameras, and Minecraft access.
For these instances to be reachable from outside my network, my home router forwards traffic to the firewall. This allows external peers to access their correct instance. Without this port forwarding rule, remote devices would have no path to reach the firewall.
Below is an image of an example config on this router.

Separating instances based on purpose ended up being really important. Initially I was managing access by remembering IP addresses when writing firewall rules. That quickly became very messy. Instead, placing users into categorized instances made access control far easier to manage.
This change was made because of experience. At one point my brother, who was only supposed to access a Minecraft world, was able to reach the game server's login page. While harmless in that situation, it showed me how easily messy rules create gaps in control. After that, separating access into dedicated instances was the clear solution.
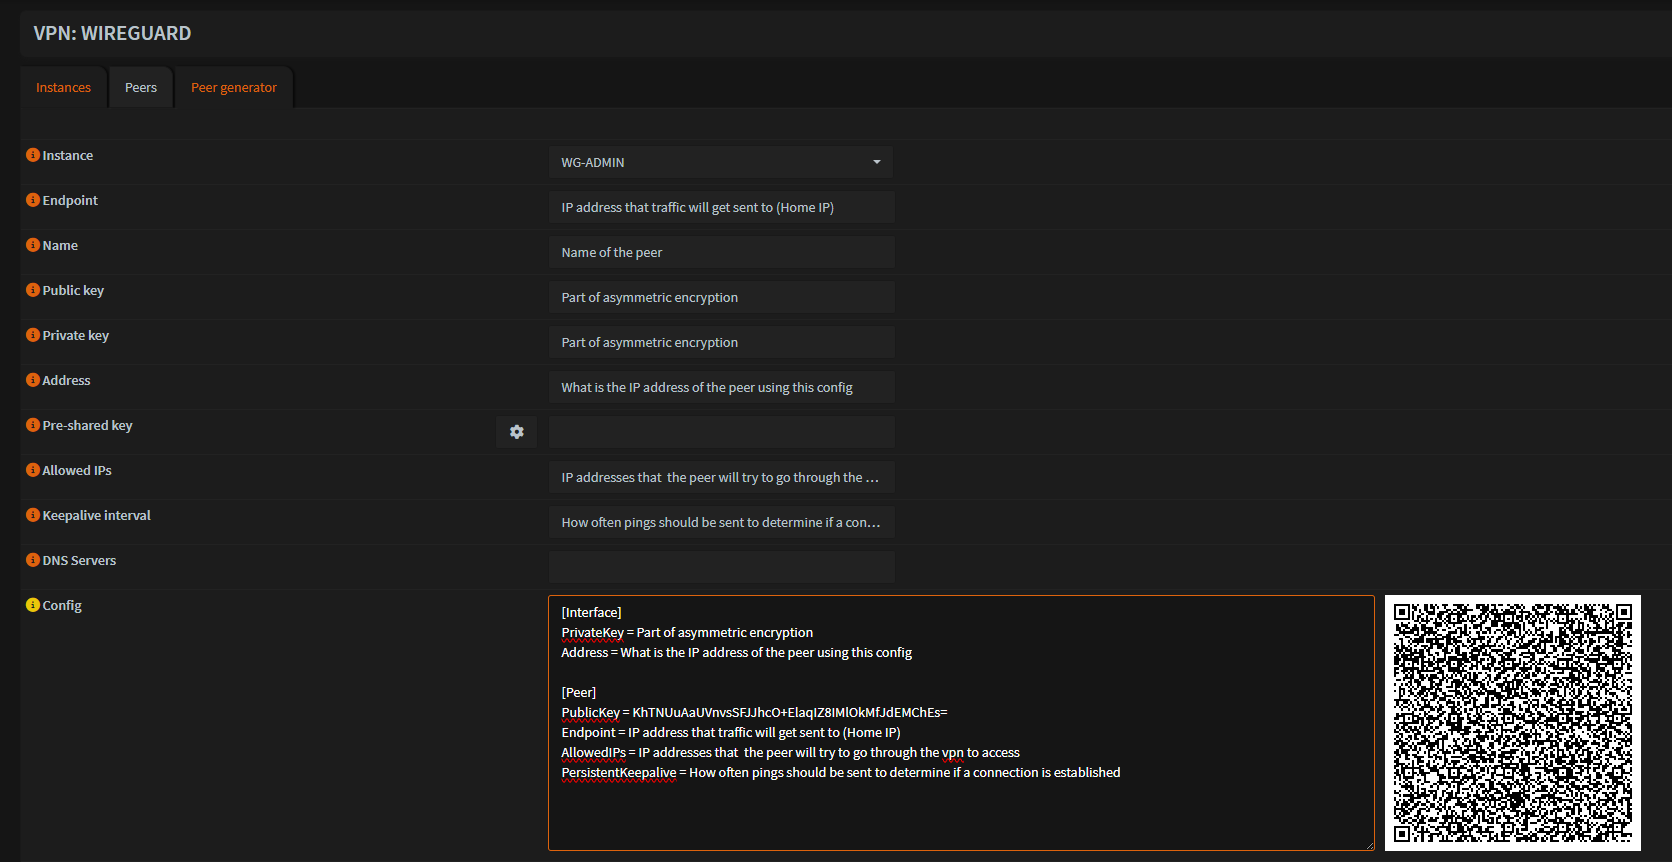
Creating a Peer
For any device to connect, a peer must first be generated on the firewall. OPNsense offers a built-in peer generator that simplifies this process.
A peer configuration has several main parameters:
- Instance (Which WireGuard interface it belongs to)
- Endpoint (Public address of the network)
- Public and Private Keys
- Addresses (the IP assigned inside the VPN's network)
- Allowed IPs
- Persistent Keepalive
Once the configuration is finished, OPNsense automatically generates a configuration text and a QR code. This makes onboarding a peer really simple. Mobile devices can easily scan the QR code, while computers can import the config file directly into the WireGuard application.
The image below shows that peer generator.
Once the config is imported and enabled on the device, the rest of the setup takes place on the firewall.
Firewall Rules and Access Control
After the peer is created, firewall rules decide what the connected user can actually access.
If the peer belongs to an instance that already has rules defined, the user can immediately connect and reach those services. If a new instance is created, the interface must be enabled and firewall rules must be written for it.
These rules are meant to be restrictive and based only on the user's purpose.
For example:
- Admin instance allows full access to the lab network so I can manage systems as if I were physically home
- The Minecraft instance only allows traffic to the server's IP and port.
- The camera instance allows access to only the camera system.
This approach stops users from accessing services they weren't intended to reach.
Troubleshooting
Although the final setup looks straightforward, getting to this point required a significant amount of troubleshooting.
Early on, I spent way too much time attempting to diagnose issues using only the web interface. Over time I learned that when data was not flowing, the fastest way to diagnose the problem is to start from the earliest point where traffic should appear.
When a connection attempt fails, I first check for activity through the OPNsense status page or directly from the shell.
Using tools like sockstat, I can see whether traffic is reaching the firewall's WAN interface and the WireGuard service itself.
If traffic is not reaching WAN, the problem is usually one of two things:
- the peer is misconfigured
- the home router's port forwarding rule is misconfigured or has not been applied properly.
If traffic reaches the firewall but the tunnel does not establish, the most common cause is a mismatch in keys. In those cases I simply compare the configuration on the peer with the values the firewall expects.
I have also learned that the configuration generator may not update fields if changes are made but not applied before exporting the config. This occasionally leads to incorrect key values being shared with the peer.
Once the connection has been confirmed and the tunnel is active, any remaining issues are almost always firewall rules. These are usually quick to fix. A short test using one of my own devices is enough to confirm whether rules are correct.
What This Process Taught Me
The most valuable improvement from this process was not the final configuration on its own, but how my troubleshooting approach evolved.
Previously, I would retry the same configuration steps, hoping something would start working. Over time I instead learned to find the point of failure and work there.
This shift from shooting blind to a structure has made working with WireGuard significantly more efficient. Problems that once took hours to diagnose can now be pinpointed in a few minutes.
While frustrating at times, the troubleshooting process has been one of the most valuable learning experiences in building my home lab.
Enterprise Similarities
Although my home lab is on a much smaller scale, the concepts behind this setup attempt to mirror how many enterprise networks configure remote access.
Organizations frequently use VPNs to allow employees and administrators to securely access internal services from outside the corporate network. Instead of exposing those internal services to the internet, access is granted only after a secure tunnel has been made. This reduces the attack surface of the network and keeps internal infrastructure private.
In my lab, the same idea applies. Services such as Minecraft and a camera system are not publicly exposed. Access is only possible after a tunnel is connected and is passing through firewall rules matched to that connection.
Where enterprise networks differ most is scale. In my setup, peers are created manually and config files are shared directly with users. During my time with UAlbany's Cyber Defense Organization, I saw systems where users would authenticate on their own and automatically gain a VPN connection. This approach is far better for creating and then managing many remote users without manual deployment.
Although scale is massively different, the goal is the same: create secure remote access without losing granular control over what users are able to reach.
Final Thoughts
WireGuard has become one of the most valuable and enjoyable parts of my home lab. What started as a desire for remote access grew to a secure repeatable approach to network access.
Beyond the technical details of my lab, this system helped me learn an important lesson about network design: the architecture and controls matter just as much as the services themselves.. kind of like having a really nice bicycle with flat tires. It will be hard to get where you need to go. Even in my small environment, thinking over the structure I want and why can prevent mistakes and make systems much easier to manage over time.
As my lab grows further, foundations like these will help me experiment without losing a clear and secure boundary.