Over the past month, I have had the opportunity to implement a few of the things from the home lab intro post. This post isn't a tutorial; instead, it explores my experience and decision making.
With that in mind, I chose Proxmox for a few reasons. One of the primary factors was familiarity, having used Proxmox previously in a cybersecurity competition. Flexibility is a major priority when it comes to management, since I may access the environment from multiple devices. Another reason, particularly when compared to VMware ESXi, is that Proxmox is free and open source. Installing it is no different from installing other Linux distributions, without licensing and other strings attached. Finally, its support for virtualization, containerization with LXCs (Linux Containers), broad hardware compatibility, and straightforward networking made it a clear choice for my use case. Overall, at no cost, Proxmox offers a stable platform that can be relied on for the foreseeable future.
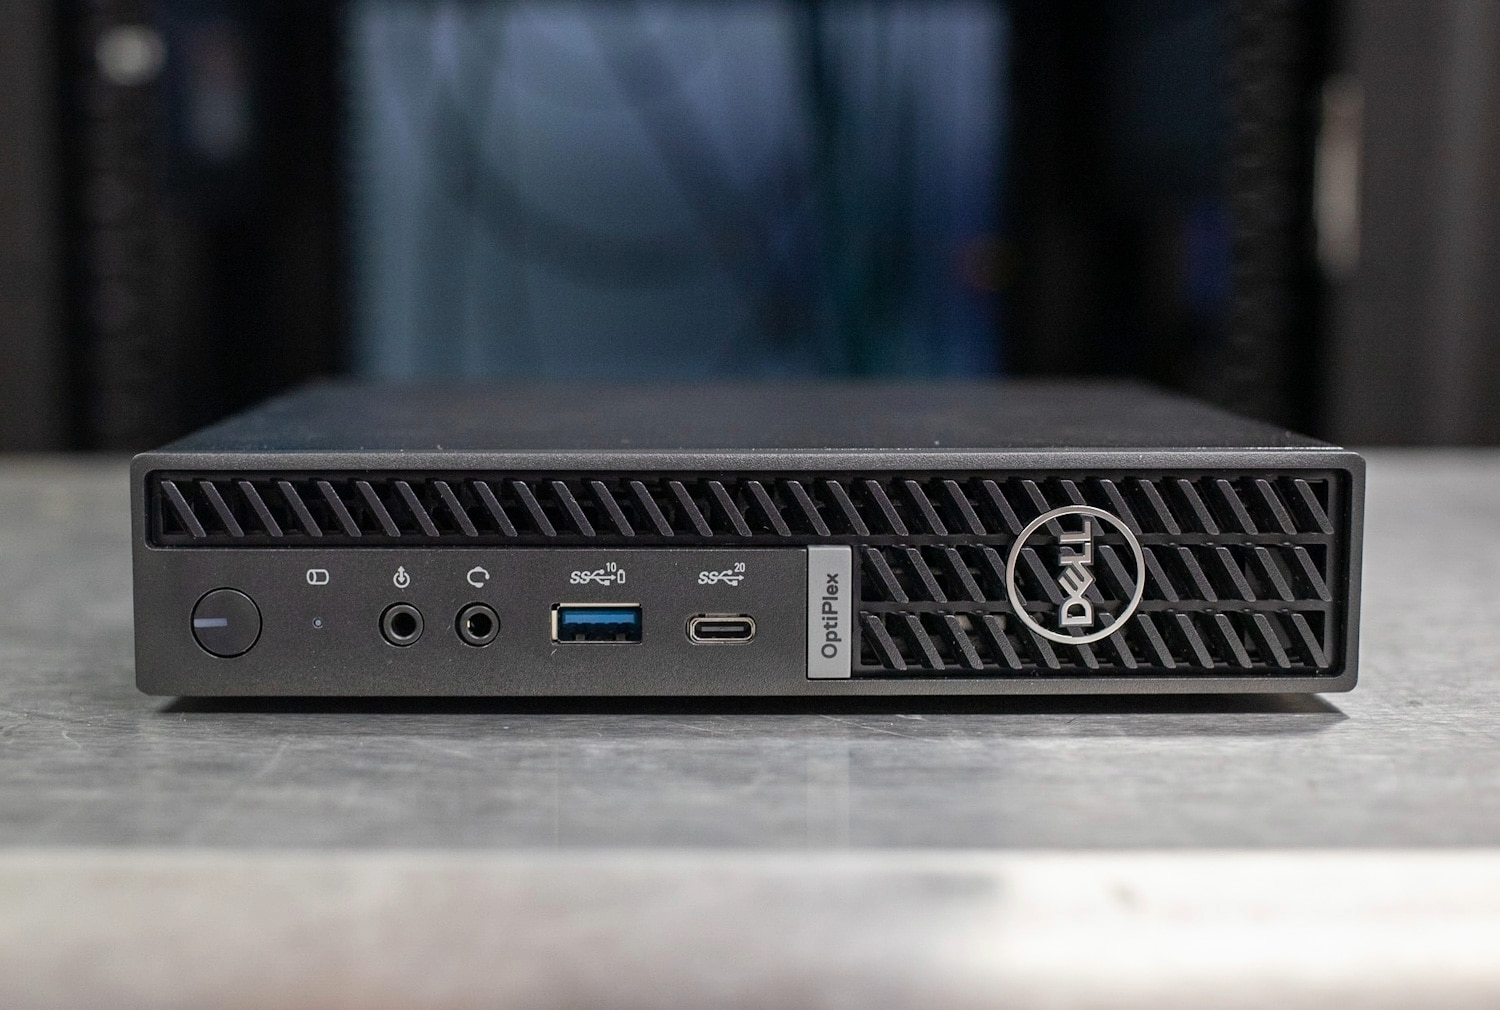
My current compute setup is a Dell OptiPlex Micro 7010. This device features a micro form factor while still offering enough power to support the virtual machines I plan on running. The OptiPlex uses an i5-13500T, which is part of Intel’s Raptor Lake generation. This processor is most significant to me for its 14-core and 20-thread performance, which is more than sufficient for my workload. The “T” designation indicates a lower clock speed and reduced power draw, with a 35W thermal design power (TDP). While this may seem like a drawback on paper, excess performance isn’t necessary for my situation, making lower power consumption a priority. When purchased, the system included a 256GB NVMe solid-state drive (SSD). Although I had a 1TB SanDisk USB SSD for backups and static images, high-speed internal storage quickly became a limiting factor. As a result, I upgraded the internal SSD to a 1TB Samsung 980 PRO, which had only 1.6TB of total writes. This SSD model has been used reliably in my desktop computer, so I was comfortable installing it in my server as well. Finally, the OptiPlex came with a single 16GB stick of random access memory (RAM). This was manageable for a short time, however, once several services (including two Minecraft servers) were running, memory became a bottleneck. Adding a matching 16GB DDR4-3200 module significantly increased the RAM ceiling. Due to these factors, the OptiPlex 7010 has proven to be a strong Proxmox host, and if further expansion is needed, hardware upgrades or additional nodes can be added without issue.
There were several challenges throughout this process that made the project more than simple direction following. These ranged from quick fixes to hours of troubleshooting. The first issue presented itself when installing the internal SSD, as physical space became a constraint. The Intel Wi-Fi card blocked the 2280 form factor of the drive due to its larger heatsink. After some research, I determined the card wasn’t critical to system functionality and removed it completely.
Another challenge involved updating the firmware on the new NVMe drive, which was two generations behind. I initially attempted to boot into an Ubuntu image to verify the firmware version and flash the update. However, I ran into an issue where no display output appeared, stopping any confirmation of progress. After multiple attempts and determining that no changes had been made, I installed the drive into a secondary NVMe bay on my main desktop and used Samsung Magician to complete the update quickly. It is possible to perform this update directly on the host; however, using a second system was the most effective solution in this case.
Booting back into Proxmox was straightforward given my prior experience, even though reconfiguring the host and restoring backups were new tasks. While this didn't present a major challenge, I learned that a full backup of a VM doesn't instantly mean it can run, often there must be a base image to boot from.
I also needed to recreate a network interface card (NIC) offloading fix due to occasional lockups. To identify the problem, I pinged the host from other devices, checked uptime, reviewed interface statuses, and researched intermittent packet drops. Based on this, I added a systemd service that disables NIC offloading features after establishing a network connection, which fully resolved the issue.
# /etc/systemd/system/nic-offload-fix.service
[Unit]
Description=Disable NIC offloads
After=network-online.target
Wants=network-online.target

[Service]
Type=oneshot
ExecStart=/sbin/ethtool -K nic0 tso off gso off gro off rx off tx off
RemainAfterExit=yes

[Install]
WantedBy=multi-user.target
The final problem I encountered involved the newly installed RAM not being recognized initially, which was resolved by reseating the module.
Although everything is now functioning properly, the most valuable part of this setup process has been learning how to identify and solve problems with limited information. Taking the time to research, test, and reconfigure systems has allowed me to overcome issues I hadn’t seen before. Developing my troubleshooting skills alongside steady progress has been very rewarding.